We’ve lived in our RV since 2012 and have been happy with most of the factory-installed interior finishes – such as walls, ceilings and floors. However, the ugly carpet in our bedroom has been on our hit list to replace since almost day one.
I’m happy to say that we finally replaced our bedroom carpet – in just one afternoon – all for under $60! It was pretty quick and easy and now we wish we’d done it 3 years ago. If you’re thinking about replacing the carpet in your RV (or even in your house) with carpet tiles, read on.
Most factory-installed RV carpet is not great

Most RVs come with cheap ‘RV carpet’ installed in the bedroom, slides and cab area. Here are my thoughts on RV carpet:
- Almost every RV I’ve been in had a light-colored carpet for some reason. This is simply not compatible with the way most RVs are used – to camp in campgrounds! Campgrounds are full of this annoying stuff called dirt. Dirt is everywhere and it’s incredibly easy to track that dirt into your RV and all over your carpet.
- Our installed carpet was very thick. It included heavy carpet padding and was folded over on all edge (vs stretched), and it was held in place with multiple staples. This made for a bulky and awkward transition from our floor. It also served nicely as a dirt and sand trap and it was next to impossible to clean. To add to the issue, most RVs don’t come with a central vacuum. We use this lithium battery hand-held vac to keep the floor clean, but it’s simply not powerful enough to pull all the dirt through the carpet. Using a steam cleaner in this small space is impractical and would encourage mold and mildew.
- The other problem with thicker, nappier carpet is that it’s heavy. Our carpeted bedroom is in the very back of our motorhome, and this is the worst place to add weight to most Class C RVs. As it sits behind the rear wheels, the extra weight goes onto the rear axle while lifting weight off the front (braking & steering) axle – not good! By replacing our carpet with lighter tiles, we lost more than half the total carpet weight – not including the dirt, sand and grime that was trapped in the rug :-) !
- Finally a pet peeve of mine. Of all the RVs I’ve seen, rarely does the carpet match the rest of the interior decor. Our carpet had a yellow tint to it, which didn’t match the rest of the colors in our RV – go figure!
Fortunately, most newer RVs have little or no carpet – in other words, the industry appears to have gotten the message. Unfortunately that doesn’t help those of us who already have old, ugly, carpet!
An Easy Upgrade – Carpet Tiles to the Rescue!
When checking out carpet replacement options we thought about going with a lighter-weight, traditional carpet. However, we nixed that idea because they’re more complicated to install than we wanted. Terms like “traditional carpet gripper, underlay, double-stick, direct-stick and release systems” had us running since we planned to install the carpet ourselves.
Modular peel-and-stick carpet tiles were the obvious choice for us.
Carpet tile choices are expanding today because of the flexibility they offer. Companies like Flor are leading the way with unique and eco-friendly carpet tiles for home and office. We checked them out first as they have many colors, patterns, and materials to choose from. Plus many of their tiles include recycled materials – AND they’re recyclable when you’re done with them, too. They’re a bit on the pricier side, but they’re definitely well-made. (Plus they’ll send samples and they ship anywhere.)
That said, we couldn’t find the specific brown color we wanted, so we checked out a few local retailers.
Lowe’s had some brown carpet tiles in stock, but we weren’t convinced they were thick enough. And at around $95 for a box of 16, we decided to think about it. We went to Home Depot, but the only had speckled tiles in stock and we felt they would clash with our colors.
I should add that we were on a self-imposed deadline, as we wanted to get these installed before heading cross country in May (and if you know us that’s not surprising!) To save time, we went shopping online at Amazon. We found tons of choices there so decided to buy online and ship to our RV park.
After looking at colors for awhile (a fun but tedious process) we took our chances and picked these neutral brown 12″x12″ self-stick tiles. Our bedroom is small so we only needed 16 tiles around the bed.

Installation Day
When our tiles arrived we inspected them and were happy to see the color was perfect! We also realized they were thinner than expected. But as we laid them out they appeared to be thick enough for our needs. We also realized they were probably the same manufacturer as the tiles we saw in Lowe’s earlier…but for almost half the cost!
We were happy with our purchase and ready to install!
Here are the steps we took to replace our carpet:
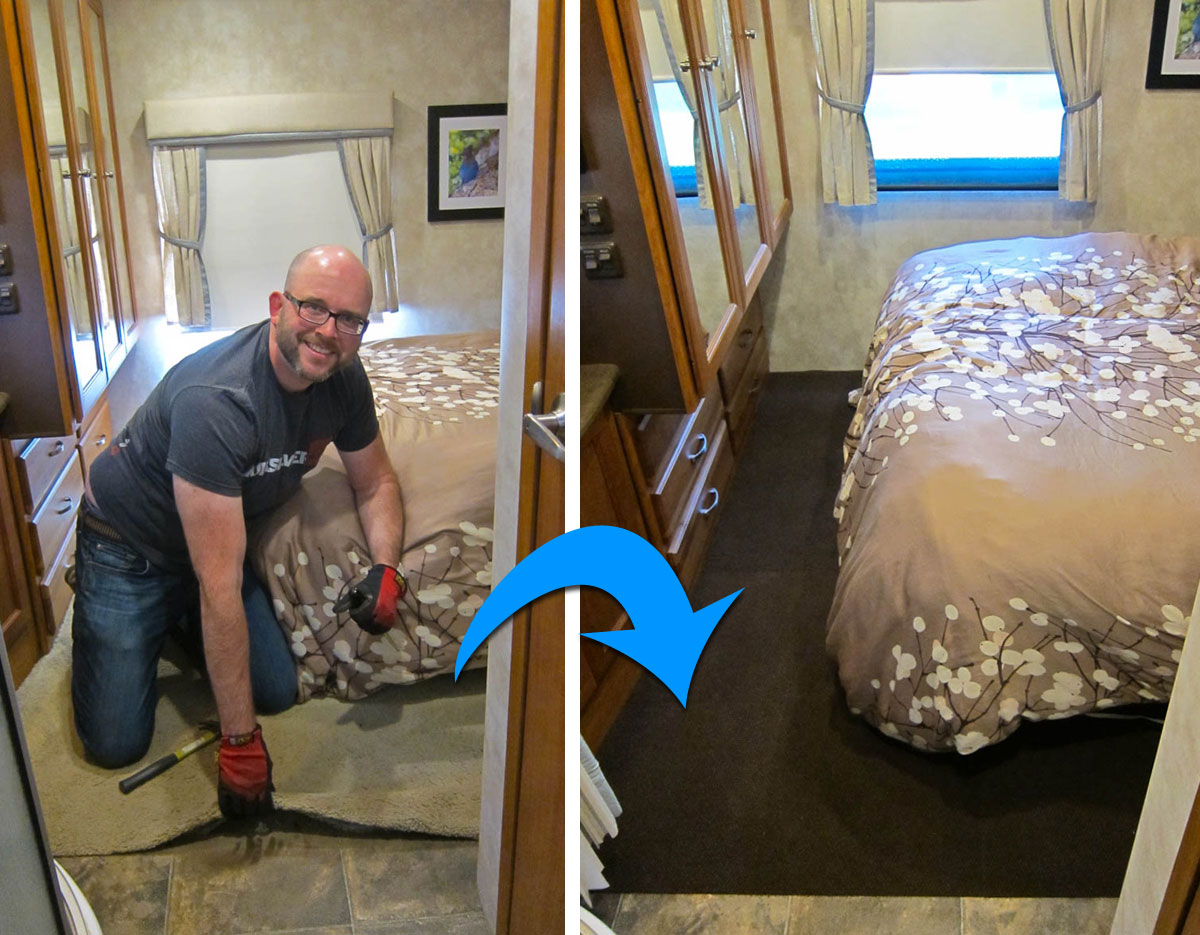
Remove the old carpet
- Rich put on some work gloves and pulled up our old carpet and foam padding. He started at the front edge, and worked his way around the rest of the walls. I had the important task of taking photos and documenting his progress:)
- We were surprised to find that the vinyl flooring from the front of our rig continued under the carpet through the bedroom, for about two-thirds of the way. This vinyl connected to a plywood floor ‘underlayment’ (or floor) in the back of the room. We decided to leave it this way, since the seams were clean and our carpet tiles would lay flat just like the old carpet had. If the vinyl had gone all the way back we probably would have left the bedroom without carpet and used runners or rugs – but no such luck.


Prep the floor
- Once all the carpet and padding was pulled up, I followed behind with a pair of pliers and pulled out any staples that remained, which had held the carpet in place.
- I swept the dirt and debris from the vinyl and plywood floor with a broom, and finished the corners with a handheld vac.
- I washed the surfaces with a Swifter (perfect for RVers btw).
- I washed the floor down with alcohol to remove any potential sticky materials.
- After a final rinse with clear water we were ready to install.


Install the new carpet tiles
This part was a bit trickier than pulling up the old carpet. It required some careful measuring and some patience.
Note: We decided we were fine without any carpet padding. Our goals were only to improve the look of the room, while providing a moderately soft surface to walk and a bit of insulation. If you want a more padded feel there are thicker, padded tiles out there.
- We began by placing the carpet tiles in the front of the room first. This was important because we needed to have a nice, straight line when looking from the living area into the bedroom. (We called this line the ‘leading edge.’)
- Rich started in the front corner and measured the notch around the shower area, and the angle from the cabinets, which would need to be trimmed from our first tile. He made note of the measurements, drawing dots on the clear film that covered the back of the tile.
- He connected the ‘dots’ (or measurements) with a straight-edge ruler and black marker, which gave me a template to cut out of the square tile.
- I carefully cut along outside edge of his lines, just in case it needed to be trimmed more closely.
- With our custom shaped tile, Rich then peeled back the clear film and laid the tile. He pressed the leading edge first, for a clean finish. He then gently pressed the rest of the tile out and toward the edge that butted against the cabinet first, making sure it fit snugly. (There’s a bit of stretch or give so you can tuck them in perfectly.) He gently pressed the rest of the tile into place.
- We continued along using this same process for the rest of the floor – Rich measuring, me cutting, and Rich laying the tiles.
- We worked across the leading edge first, since that’s the first thing people see when looking into the bedroom.
- Once the leading edge was finished, we worked our way to the back of the room. For our small RV bedroom, this essentially meant filling tiles around the square edges of a platform that serves as our bed, so it wasn’t too tricky.
- NOTE: We did have one wall that was slightly curved. Rich was extra careful in measuring the dots and then hand connecting them into a curve shape. You could trace around any curved item, like a large dinner plate if you don’t want to sketch the dots on a curve. Or there are drafting curve tools you can buy.


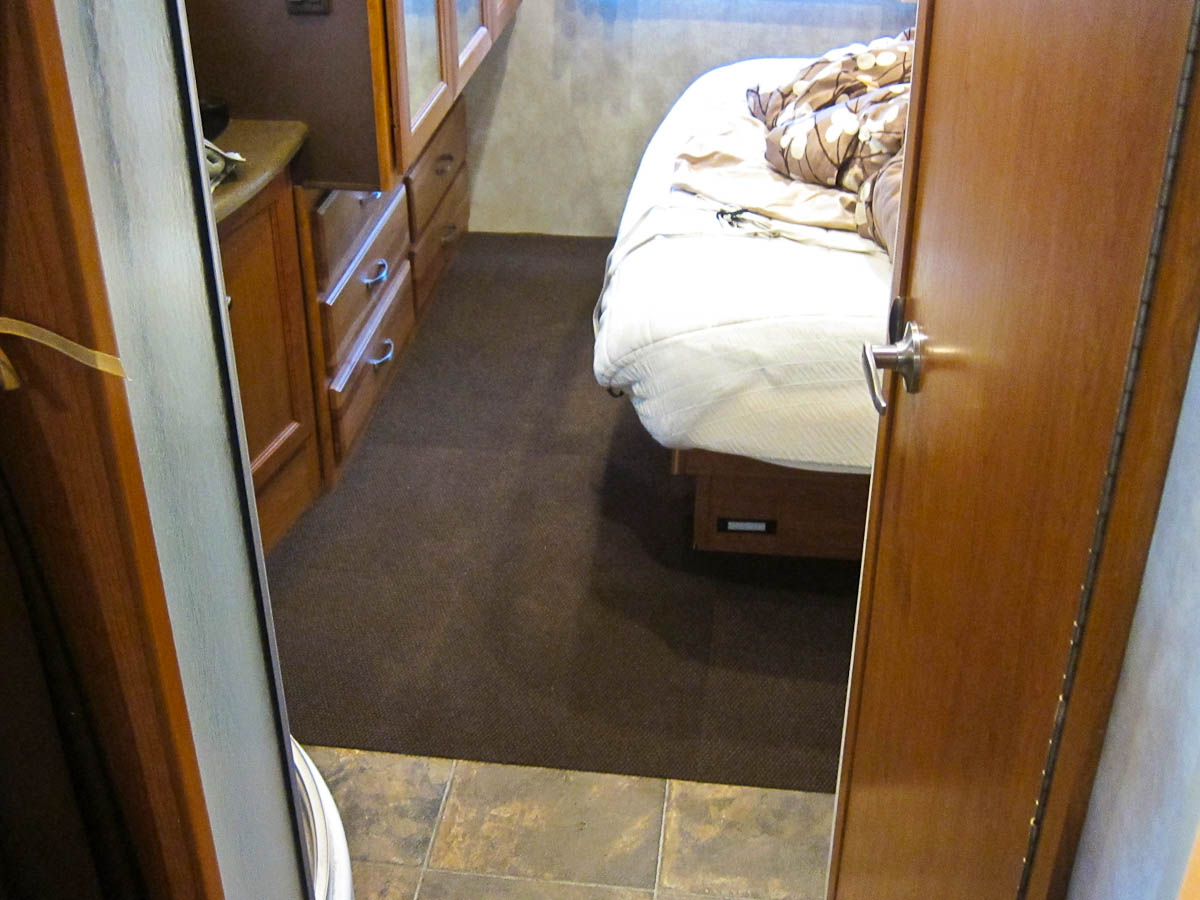
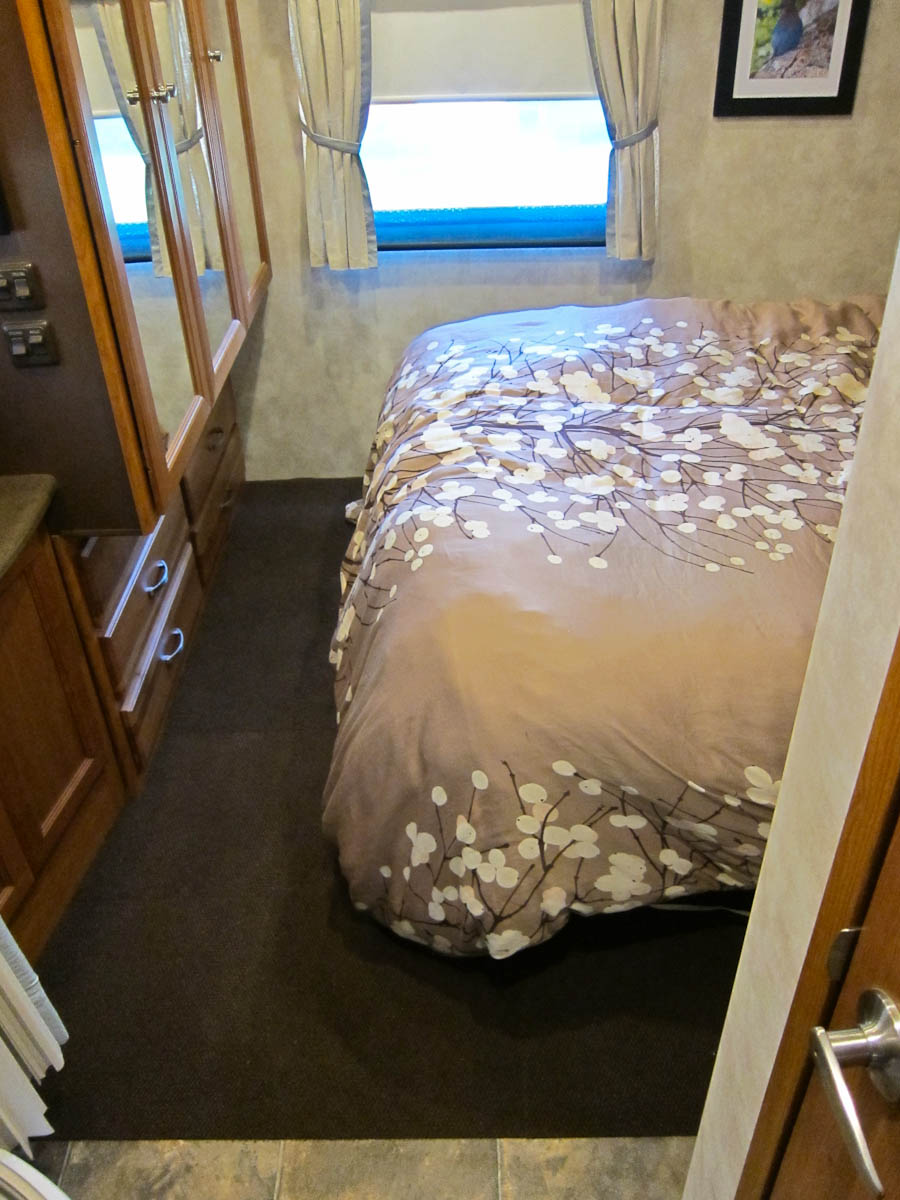
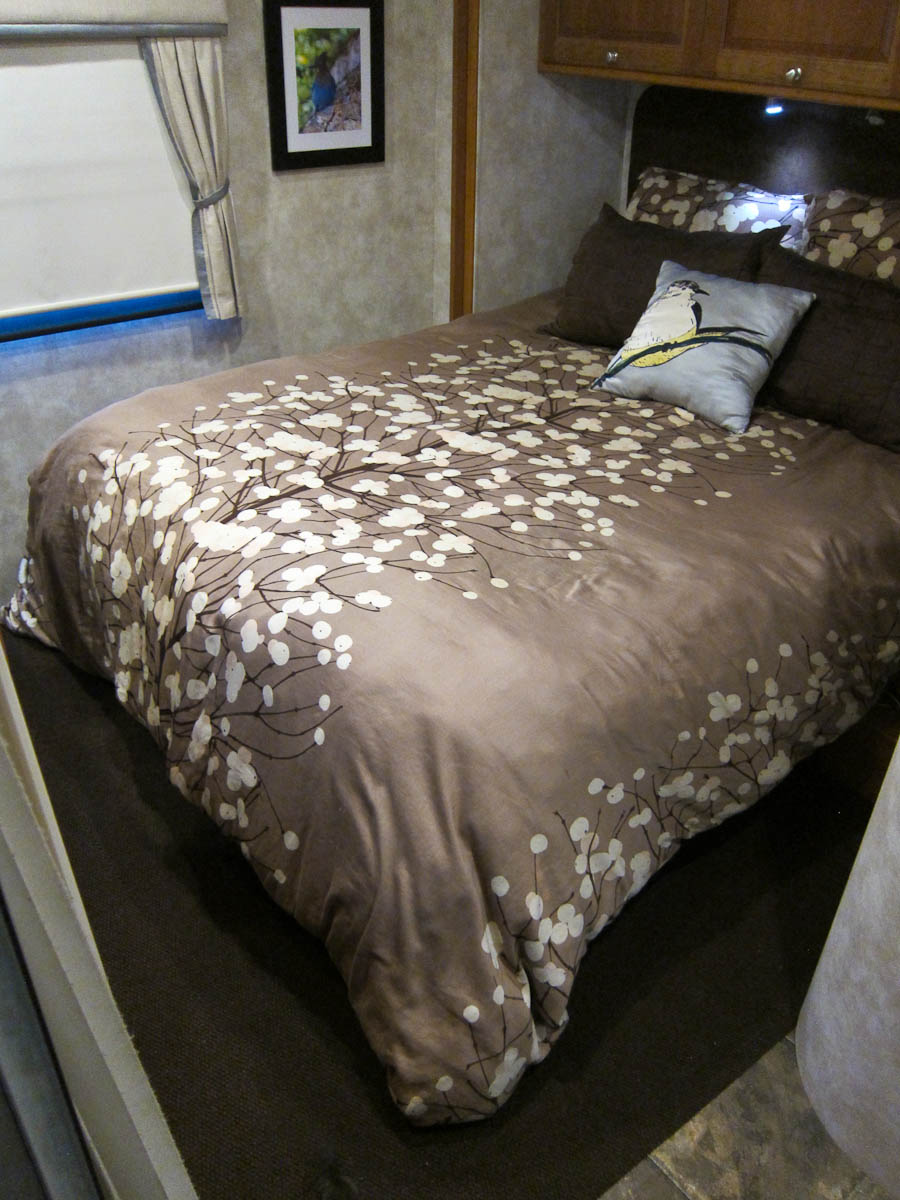
Voila.. A new look!
We’re thrilled with the new look of our neutral brown carpet tiles! The color is richer and the floor has a custom look since it perfectly matches our accent walls and complements our decor.
As an added bonus – if we ever spill anything on the tiles, or they wear out we can simply replace a few tiles as needed. (We had several large scraps leftover but would need to buy a new box to replace any tiles.)
The new carpet doesn’t feel quite as plush as the old one, but it works fine and feels as soft on my feet as I’d hoped. It is a shorter nap, more like a commercial grade carpet but we prefer it this way, since it’s easier to vacuum and keep clean.
One thing I did notice over the last few weeks, is that little white specks of normal household dirt tend to stick in the carpet here and there, even when we use the vac on them. If needed, I sweep those out with a stiff hand broom and it looks super clean again.
In any case, we’re happy with our new carpet tiles! From the look, the feel, the maintenance (easy)…and the fact that they remain in place really well, too.
If you’re dealing with outdated, stained, or just plain old carpet in your RV we recommend you replace it with self-sticking carpet tiles. It’s a minor investment that provides a ton of value – and in a small space like an RV little changes go a long way!
If you live in a stick-and-brick house: Carpet tiles are a good solution to mud rooms, nurseries, or really any room. It’s a good idea to start with a smaller space first – but assuming you’re somewhat handy, we bet you’ll love the results in your home.
Thanks for reading and until next time, happy trekking!


Hello Kathy. I would first like to thank you on all of your How To and DIY articles. I want to change many things to this old 80’s style 5th wheel that we inherited. It has that Turquoise carpet that was the big thing back then. The problem with it is that it is faded and just ugly. Trying to keep the carpet clean with those with boots coming and going is a big problem. This 5th wheel is narrow and the carpet is put in certain areas all over the trailer. Kitchen and bathroom have linoleum floors. The main problem with replacing the carpet in the bedroom is that the big step up to the bed has carpet molded over the step which carries around the bed on both side. There are raised areas on both sides of the wall sides (Maybe part of the floor beneath?) Anyhoo..the carpet is molded around that, too, so just ripping up the carpet will be the easiest part but replacing it with fabric tiles(what I want) will not be easy as it has to mold over these areas. Even vinyl tiles will not work. Do you have any idea on what I can do? The bed area in the 5th wheel is basically a big loft area so the mattress is on the floor area covering a storage compartment. It is very narrow. My husband wants to keep it because he thinks it helps keep that area over the goose neck warm. I just want something different and not so old, faded, and ugly. Carpet also holds in smells, too. I can’t afford to just have the bedroom carpet done by professionals so any help or ideas would be appreciated.I’m sorry for the long post. Thank you, again, for all of your wonderful articles.
Hi Julie,
You’re welcome and glad you’re finding value in reading our DIY articles. We love projects and are happy to share! I have several thoughts regarding the carpet in your fifth wheel. I hear you in that the carpet is the 80’s color turquoise and you’d love to replace it. That said, I highly recommend against you trying to do so with tiles, carpet tiles, or normal carpet. The ‘easy’ part would be in pulling out your existing carpet. But the step up, the molded areas around the bed, etc., will be very challenging to lay new carpet onto.Plus you said there are patches of carpet throughout the RV, which are challenging -even for professional installers to do. This is why RV carpet installation is a specialty in the profession. If you want a second opinion there is a carpet expert named Ernie Eckberg, in this thread who could probably talk to you for a very reasonable cost. There’s also other info from people who have 5th wheels there, who talk about their experience with carpet.
There are two easier ways you could go, providing your carpet is in decent shape. The first is to steam clean it throughly (either yourself by a professional). When you do this there is a product that can help eliminate old odors at the same time. If you go this way, obviously your carpet color would remain the same. So you would want to be good with the idea of updating a ‘vintage’ look, which is what it sounds like your RV has in its’ design. You can Google search and find tons of updated vintage looks that are very appealing. Personally I am a fan of what I call contemporary vintage as it plays to the original history of the RV. This couple, Flippin’ RVs, has a number of articles and before/after photos that give you an idea of how you can pull the vintage look off very well. You could use the same color scheme you have in the RV but add in classic elements of cream, white, etc., to ‘contemporize’ your look.
The 2nd option I recommend is that you check into carpet dye. This article explains it, and it seems they do recommend you have someone dye the carpet professionally. They may be able to alter the color of the carpet when they do so, and my guess is it’s more reasonable than laying down new carpet. I realize you are on a budget so you could look into doing it yourself, as well.
I hope these ideas help you, and best to you on your project! Let us know how it goes.
We live in a fifth wheel and are wanting to do this in our bedroom, how did you go about getting the carpet out around the bed? Did you just cut as far back as you could or is there a trick to getting this done without removing the bed? This part scares me!
Hi Audra – In our case the carpet didn’t extend to the area under the bed. They cut/stapled it around the bed, but it stopped at the base of the bed. If yours goes under, is it possible to lift the bed platform and cut the carpet around the edges so you can remove it? You could cut right against the bed platform, too, but I’d rather get rid of all of it if possible. Good luck!
I have wanted to change our short shag in the bedroom and thought of carpet tiles too.
I have also taken down some of the inside valances to change the material to match my decor but ended up just leaving the outside ones. I could not get your video to open to see how you did the valances.
Hi Claudia – you can go right to Youtube to watch the video. Here’s the link: https://www.youtube.com/watch?v=V4SZguPFr6Q&t=2s